My 2012 Christmas card theme is peace, DIY multiple original limited edition intaglio prints.
May this season brings peace to you and the world over!
I was looking for ways on how to recycle my piles of toasted CD in a unique and useful way. I remembered a brief printmaking lecture by the Philippine Association of Printmakers I attended that led me to rediscover engraving. The lecture by Ms. Ambie Abano showed the use of acrylic sheets in engraving. Then I thought maybe the plastic CDs can also be used in the process. So I tried making a print using CDs and here are the steps I took:
2. A finished design on the reflective side of the CD. It's a little hard to scratch the drawing on a plastic so make sure your burin is always sharp and pointed. Use a sturdy tool, and wear glasses to protect your eyes. The shiny surface also makes it hard to see your drawing completely, so if you like you can take out the reflective coating on the other side (Step 3). Simple designs with lots of textures work best with intaglio printing especially on plastic, so work more with different kinds of textures and patterns.
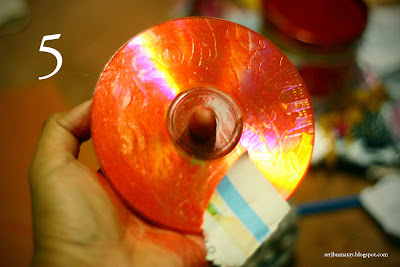
3. Here's how to remove the reflective coating easily: with a sharp x-acto knife or cutter, carefully lift sideways the coating off on a small part at the edge (see picture above). Then, once you have taken out a few small coats, it is easier to peel them all off with a very sticky tape. Clean up your "naked" CD with a moist cloth. Be very careful in disposing of this reflective coating, as it's very thin and light it might be toxic to leave it anywhere.
4. Materials in making your prints:
a. Pre-moistened paper. Dip your chosen textured paper in water then place on dry newspaper to absorb excess water.
b. Semi-soft board or linoleum, can also be your cutting mat, where you will be placing your CD plate. Make registration marks in pencil to align your CD plate and paper in center
c. Waterproof paper or wax paper
d. Printer's ink (intaglio ink) which can be bought in craft stores or printing supplies, or oil paint in tubes, though I haven't tried that yet. Mix with baby or mineral oil if it's too thick. Use baby powder to remove some in your hands, so as not to spoil your clean paper.
e. Round and heavy "flattener" to give pressure to your plate, this serves as your DIY machine press.
5. Using your fingers, thoroughly smear paint onto the engraved side of the plate. Then carefully remove excess paint with pieces of paper. Make sure some of the inks are still on the grooves (or lines) of the plate. After carefully removing excess paint, wipe your hands or use baby powder to absorb some unwanted inks. Hooray, you are now ready to print!
6. Lay your materials in this sequence: wax paper - pre-moistened clean textured paper front side down - CD plate with inked side up - linoleum or cutting mat. Make sure your registrations are aligned on the CD and chosen paper. Once they're all okay, press over the CD plate with your round "flatenner" thoroughly, making sure all the surface of the CD plate is completely pressed and covered. Lift up the paper and surprise! Congratulations on your first print!
7. If you are satisfied with your print, hang it dry or lay it down on clean dry papers. After drying, you can label your print, just below the design with edition numbers, title, and of course your signature with a pencil. If you don't like your paper warped-up, you can flatten them with heavy books for several days.
Okay, some of you might wonder, why bother with all those tiring steps when you can just print on an inkjet printer? Well, it is a labor of love, and I'd like to ask you, which of the two would you rather receive: a toxic laser print or an original intaglio print sprinkled with some love and sweetness?
Merry Christmas and have fun printing!
***
If you like this post, please consider donating.
And please check out my youtube videos and sub my channel:


3 comments:
print pala yun, knowing that made it even more awesome! :D
thanks, perg! buti hindi mo tinapon haha. you can use it as book mark. merry christmas!
Thank you, Sergio, I am starting my first printmaking / intaglio tomorrow. You are inspiring! - pam russell
Post a Comment